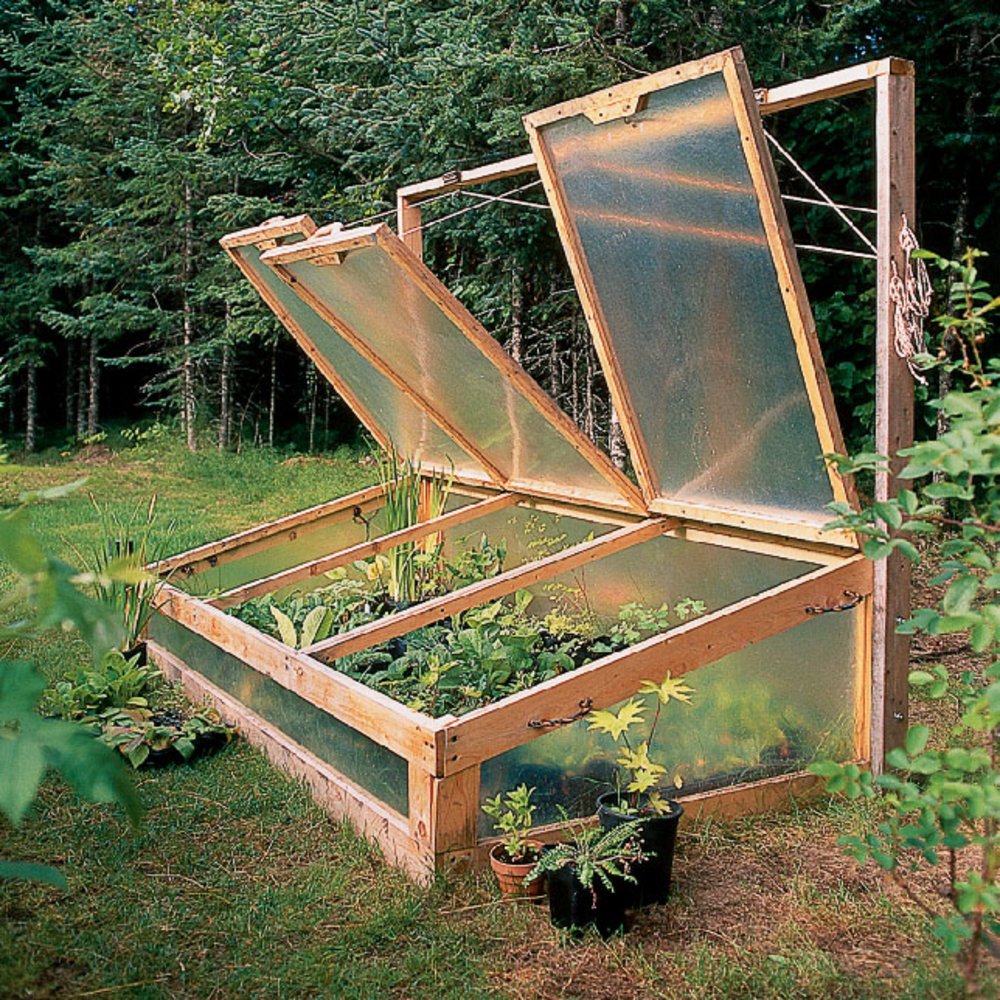
Beginner's Cold Frame Plans for New Gardeners
Starting a garden can be an exciting endeavor, but it can also be daunting, especially if you're a beginner. One way to ease into the process is by building a cold frame. These simple structures provide a head start for your seedlings, protecting them from harsh weather conditions and giving them a boost before you plant them outdoors.
What is a Cold Frame?
In essence, a cold frame is a mini-greenhouse. It's a box with a transparent lid, typically made of glass or plastic, that traps the sun's warmth. This warmth creates a microclimate inside the frame, allowing you to start seeds or harden off seedlings weeks earlier than you could outdoors.
Benefits of Using a Cold Frame
A cold frame offers several advantages for the new gardener:
- Extended Growing Season: You can start seeds and grow plants earlier in the spring and later in the fall than you could without a cold frame.
- Protection from the Elements: Cold frames shield delicate seedlings from frost, wind, and heavy rain.
- Warmth and Humidity: The trapped heat and moisture within the cold frame create an ideal environment for seedlings to thrive.
- Easy to Build and Affordable: You can easily construct a cold frame using readily available materials, making it a budget-friendly option.
Building Your Cold Frame: Step-by-Step Guide
Materials You'll Need
Before you get started, gather these materials:
- Wood (pressure-treated lumber is best for longevity) for the frame
- Screws or nails for assembly
- Clear polycarbonate or glass sheets for the lid
- Hinges for attaching the lid
- A latch or handle to secure the lid
- Optional: Weather stripping for a tighter seal
Building the Frame
- Cut the Wood: Determine the size of your cold frame and cut the wood to the desired dimensions. You'll need four side pieces for the base and two pieces for the top.
- Assemble the Base: Join the four side pieces using screws or nails, creating a rectangle or square.
- Attach the Top: Cut the two top pieces to the same width as the base. Attach them to the base using hinges, ensuring the top can open and close smoothly.
- Install the Lid: Place the glass or polycarbonate sheets over the top frame and secure them in place. You can use screws, clamps, or glazing tape for this step.
- Add a Latch: Secure the lid to the frame with a latch or handle to prevent it from blowing open in windy conditions.
- Place Your Cold Frame: Choose a sunny location in your garden with good drainage. Place the cold frame on a level surface and fill the base with about 4-6 inches of potting mix.
Tips for Using Your Cold Frame
- Ventilate Regularly: Open the lid of your cold frame on sunny days to prevent overheating. You can also prop open the lid a few inches for better ventilation.
- Water Sparingly: The enclosed environment of a cold frame can lead to high humidity, so water your seedlings only when the soil feels dry to the touch.
- Monitor Your Plants: Keep a close eye on your seedlings and make sure they are receiving adequate light and air circulation. If they start to look leggy, consider thinning them or moving them to a more open space.
- Hardening Off: Before planting your seedlings outdoors, gradually acclimate them to the harsher environment by exposing them to increasing amounts of sunlight and wind for a few hours each day.
Building a cold frame is a simple and rewarding project that can greatly enhance your gardening experience. It's a fantastic way to jumpstart your growing season, provide your plants with a safe and nurturing environment, and enjoy the fruits (or vegetables!) of your labor sooner.


0 comments:
Post a Comment